
We have a cheap little dolls pram that was passed down from my cousin’s children. Well to be more accurate, my uncle and aunt had it in the back of their car to take to an op shop when my mum happened to see them, and saw the pram, and claimed it for my children. We only had one pram at the time (that was my pram when I was little) and it was hotly contested as a car mover, blanket stroller, pram for the little people themselves to put themselves in, and of course, for the dolls.
The little pram is more stroller like than the other one. I neglected to take a before photo, but I’m pretty sure it is this one from Kmart but an older version in pink (I’m glad to see that they come in blue and white now, not just pink and pinker). I’d already fixed the top strap part twice which broke when my four year old was using it as a wheel chair, and the bottom part had holds in it where it fits on to the bottom.
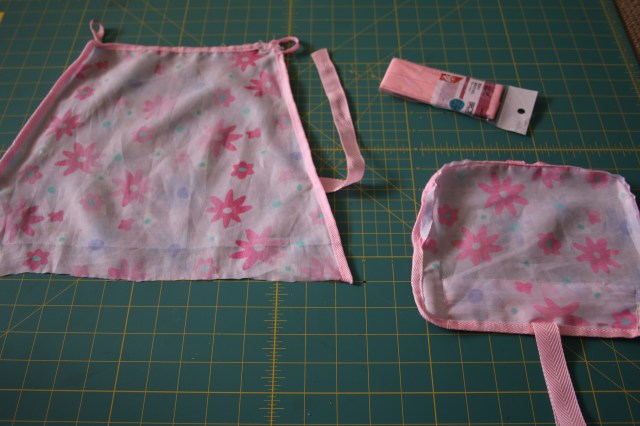
I started unpicking the seams but it was taking too long, so I just cut along the binding and decided to add a 1cm seam allowance where it was joined together. I also decided to do two layers so it was a bit thicker and would look the same from front and back – one layer would be fine though, this is purely for aesthetics and because I’m an over achiever. I also cut off the waist straps to reuse.
I went to cut it out but by then the dollies were having a sleep tucked in with the material, I had to wait until they were ready to wake up. My toddler is a routine based parent and I get into trouble if I pick the dolls up while they’re still sleeping. We watched Daniel Tiger to pass the time while we waited.

I realised after I’d cut it out that I should have thought more about placement – I cut the bottom piece out the wrong way. I allowed a bit longer to wrap underneath to make the pieces that slide on to the bars (that might not make sense unless you have seen a pram like this). I put the bottom and top pieces together first as this was how the original was done.
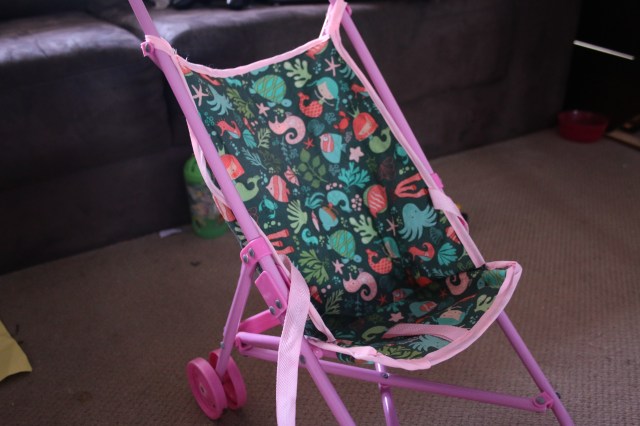
I tried to follow the way it was put together originally with the bias tape binding but I didn’t do the best job of this. I made new loops for the top out of bias tape too. I’m not the best at using bias tape, so up close there’s lots of mistakes but from a distance it looks great and will make the pram hold up for a while longer. It gets a fair bit of use around the house, and was causing lots of frustration when the cover would slip off, so I’m very glad that I finally got around to doing this project – it’s been on my list for a while!

I know the crappy type of pram you have…would you believe at one time we had three of them!!! and I only have 1 daughter…the boys really don’t care for ‘girl toys’ hehe. The frustration everytime that silly cover slipped off was not only my daughters, it was mine too because I was the only one who could fix it. Well done…doing something so simple will make everyones life happier.
I can believe it, each dolly would need their own! So far the cover has stayed on, the doll has stayed safely in the pram, so much better.